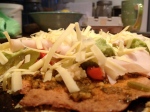
winner lchf
Prep time: 30 mins
Cooking time: 10 mins per wrap
ingredients
- 500g pumpkin, chopped up
- 4 tbsp psyllium husks
- 2 eggs
- ¼ tsp salt
instructions
- Steam or boil the pumpkin until it is completely mushy.
- Using a stick blender or food processor, puree the pumpkin until smooth.
- Add the husks, eggs and salt and blend again.
- Leave it to stand for no less than 15 minutes to thicken into dough.
- Break the dough into six balls and roll each one out into a tortilla shape (as per notes below). Keep them quite thick (+- 0.5cm – 1cm.
- In a heavy based pan, dry fry each tortilla on a medium heat until nicely coloured on the outside and cooked in the middle.
notes
this recipe takes time and patience. if you’re up for it, it’s totally worth it. you need to gently flatten the wraps, i find putting each ball between 2 sheets of oiled clingwrap works well to roll them out on. then fry them for about 15 minutes per wrap.


Do you have to drain off the liquid from the pumpkin in order for it to be as ‘dry’ as possible before you blitz it?
LikeLike
Well, I didn’t and it worked out 😉
Let me know how it goes.
LikeLike
Ok I didn’t drain the liquid from the pumpkin. I don’t think that really made that much of a difference. My problem with this is a ton of things really. The clingwrap, was a disaster. Even making sure it was oiled, it was too difficult to work with, everything stuck. Then how do you actually get it in the fry pan with cling wrap? I tried this and ended up getting some melted/stuck to the pan around the edges. Then you say a medium heat, and my mixture stuck and burned. I have an induction stove top, so I know what medium heat should be. I ended up, after the first of 6 balls failed, using baking paper. At least I could get it out of the pan without ruining it. The mixture, after putting on the pizza toppings, tasted and the texture was quite eggy. You didn’t have any further instructions on how to construct the pizza or what temps to cook it at so I had to guess and used regular pizza temps. Maybe this is how its suppose to taste. I think while its easier than the cauliflower bases, the taste leaves much to be desired.
LikeLike
Hi Kelley, wow I am so sorry you’ve been having such a tough time with the recipe 😦
Did you leave the mixture to stand for 15 minutes to thicken up?
To transfer from the cling wrap – remove the top layer of cling wrap first, then I flip the base onto my frying pan, and remove the bottom layer of cling wrap (which is now on top). I use a frying pan that is larger than the pizza base – perhaps you can try that?
This recipe was just for the bases, but in order to construct them, I would preheat the oven to 220*. Transfer your cooked base to a baking tray that has been lightly dusted with some coconut flour / lightly greased with spray and cook. Then add your preferred toppings (I like tomato sauce then mozarella cheese and topped with bacon, peppadews and jalepenos). Pop into the oven and bake for around 10 minutes – keeping your eye on it so it doesn’t burn. The cheese should be melted and browning. Remove from the oven and slice.
LikeLike
Thanks for this recipe! I was also worried about stuff sticking so I thought I’d bake them first then fry them but I don’t think frying them will be necessary they’ve come out beautifully! I used baking paper and baked them on 180C ..for about 15 mins ..they seemed fine but I’ve put them back in to dry them out a bit more – the flavour is excellent though! I only had enough for 3 tbsp of psyllium so I added 1 tbsp of tapioca flour ..a bit of nutmeg and white pepper. This recipe is definitely a keeper!
LikeLike
So glad you liked them!
LikeLike